Here's the final Hidden Octopus Movie.
The Hidden Octopus
Wednesday, March 2, 2016
Final Maya Rendering & Nuke Compositing
The associated passes consist of 8 renders excluding the shadows. I set the frames to be rendered from 120 to 250 output as tiff formats.
The associated passes consist of the shadows.
Because when the tentacle blasted out from the sculpture, the area behind it need to be empty. Therefore i took the last frame and cloned away that specific area.
At the right side, the last frame with the cloned background is brought in. With this, i set up a track camera to move along in order to cover the area where the sculpture behind the tentacle is.
At the left side, all the passes are brought in and linked up. I create a rotoscope to blend in with the main sculpture. The effects will only appear at 120 frame. I did this by using the time clip node to activate only at the selected frame.
Here's how it looks at frame 146. And the file is ready to final output as .mov file.
Lightings, Outside Texture Reference Object & Inside UV Mapping
Setting up the lightings for the tentacle. In this scene, i'm using one area light to lit up the front. A ambient light from the ground to reflect on the bottom.
Lastly, three directional lights are created. One main light on the top, one light from the side and one light from the back. All lights had different density and colour picked.
My source to create the texture and UV are taken from the sculpture. But the result isn't that good so Chee Loong suggest to use the texture reference object.
After importing the outside FBX which is exported from Houdini, a surface shader with tracked camera is created to be projected onto the model.
Prior to that, i create a texture reference object from the imported FBX. Somehow these look more natural compared to normal UV mapping.
These are the stone texture and normal map to be apply onto the inside.
The texture are applied onto the inside UV in Hypershade.
Here is what the results look like. The texture reference object worked well as the fallen outside have the projection correctly mapped.
Moving on, i will do the passes and final rendering in Maya. After this, i will do the compositing in Nuke.
Houdini Crack Effects
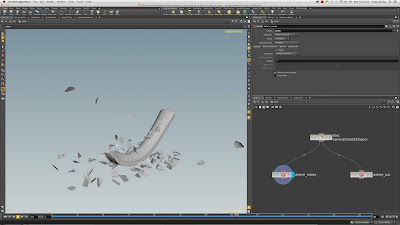
Because i already did the nodes in pipeline test phrase 2, all i need to do is simply replace the FBX and the effect is linked up and straightaway interact with the new animated tentacle.
This is the delete inside node to be exported as FBX. I will be using texture reference projection.
This is the delete outside node to be exported as FBX. i will apply a stone texture on it.
Nuke Camera Tracking
The footage which i'm going to use for the project. Captured by Ipad Air 2.
Before bringing into Nuke, I converted the .mov file into 250 tiff frames using after effects. The scene is set to be tracked and exported as FBX.
The tracking seem to be good due to the depth of field. The focal length is set according to the Ipad lens between 3.3 mm to 4.0 mm.
Here is the 3D view in Nuke. The tracks are ready to be exported.
The FBX are imported into Maya as locaters and track camera. I placed the camera position and scaled the locaters down to fit within the space and in line with the sculpture model.
In the camera viewport, i continued to adjust the perspective till it matched closely to the frame angle. Unfortunately, the first half seems to be not in line with the footage but the second half is fine.
Due to that, i decided to start the crackup at 120 frame. I will export the sculpture together with the tentacle as FBX into Houdini to create the crackup effects.
Tuesday, March 1, 2016
Octopus Tentacle UV Mapping & Texturing
I unfold the tentacle UV map. For placement, i arranged them accordingly. In the UV editor, i create a snapshot as a guide for texture positioning in Photoshop.
These are the images of real octopus i found online to be use for the model texture.
Using the images as my source, the texture are cloned and evenly colour adjusted.
I create a normal map as well for bump mapping in Maya.
The texture are applied onto the model in Hypershade. I selected the mia material X. I opt for more reflectivity to have a slimy look.
The test rendered image. Will be moving on to camera tracking in Nuke.
Thursday, January 7, 2016
Pipeline Test Phrase 2
After imported into Houdini, nodes are created to simulate the cracking.
The cracks are triggered with the tentacle movement.
The FBX are exported back to Maya.
The test phrases simulation worked. Therefore the next phrase will be moving on to refine the modelling and apply UV texture.
Subscribe to:
Comments (Atom)


